Connect TA65 to Blynk server by developers
Tip
Only for mobile app developers.
Getting Started With The Blynk App
Step 1. Download the Blynk App
Tip
This app, Blynk – IoT for Arduino, ESP32, is for developers only, not for end users.
Download Blynk – IoT for Arduino, ESP32 from the Apple App Store or Google Play Store.
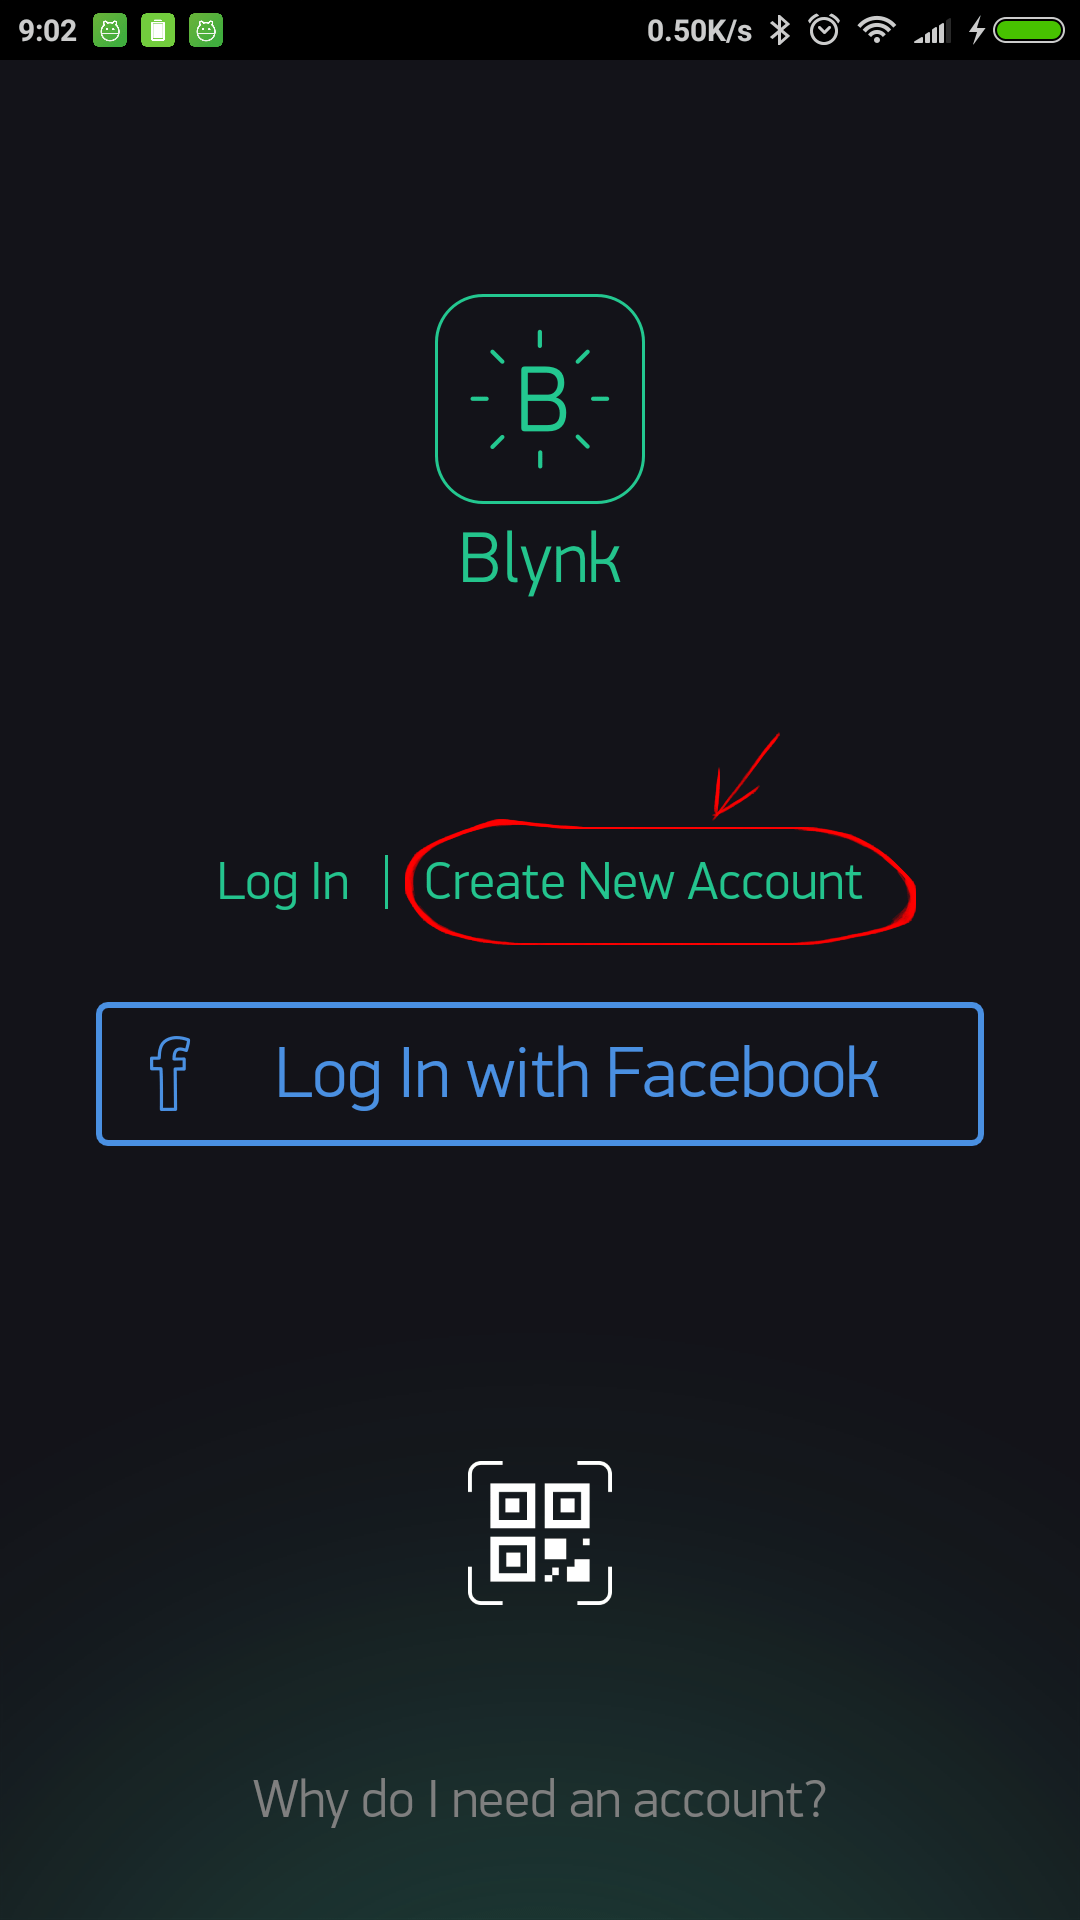
Step 2. Create a Blynk Account
After you download the Blynk App, you’ll need to create a New Blynk account. This account is separate from the accounts used for the Blynk Forums, in case you already have one.
We recommend using a real email address because it will simplify things later.
Why do I need to create an account?
An account is needed to save your projects and have access to them from multiple devices from anywhere. It’s also a security measure.
You can always set up your own Private Blynk Server and have full control.
Step 3. Import Avantec Thermostat project
After you’ve successfully logged into your account, start by import the Avantec Thermostat project.
Enter the main windows of App and click
 .
.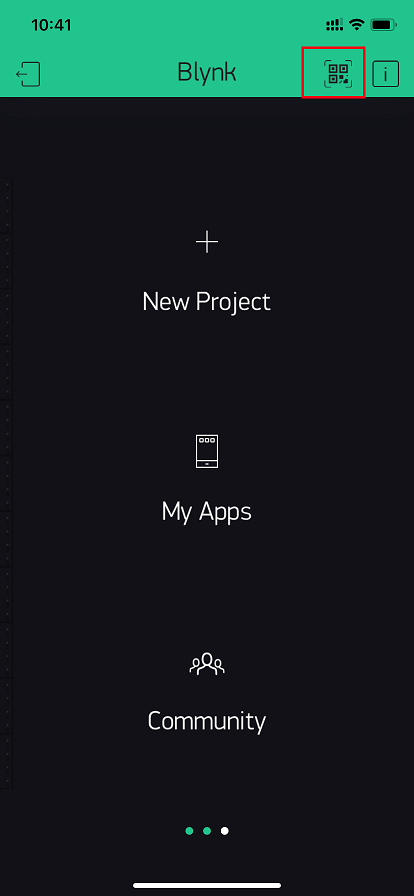
Scan Avantec Thermostat project’s QR Code.

Purchase according to the prompts. More than 32,000 points need to be purchased.

After successful purchase, execute (1) and (2) again.The Project will be imported successfully.
Step 4. Get Auto-Token
Auth Token is a unique identifier which is needed to connect your hardware to your smartphone. Every new project you create will have its own Auth Token. You’ll get Auth Token automatically on your email after project creation. You can also copy it manually.
Enter the main page of Avantec Thermostat project and click
 .
.
Email all Tokens or copy all Tokens. It’s very convenient to send it over e-mail. Press the e-mail button and the token will be sent to the e-mail address you used for registration. You can also tap on the Token line and it will be copied to the clipboard.

Your may also enter the next page to obtain tokens for different devices.


Tip
Token can only contain A ~ Z, A ~ Z, and 0 ~ 9. Sometimes tokens appear illegal characters such as “-“. You must :Refresh and get a new Token.
Warning
Don’t share your Auth Token with anyone, unless you want someone to have access to your hardware.
Step 5. Run The Avantec Thermostat Project
When you are done with the Settings - press the ![]() button. This will switch you from EDIT mode to PLAY mode where you can interact with the hardware. While in PLAY mode, you won’t be able to drag or set up new widgets, press
button. This will switch you from EDIT mode to PLAY mode where you can interact with the hardware. While in PLAY mode, you won’t be able to drag or set up new widgets, press ![]() and get back to EDIT mode.
and get back to EDIT mode.
Getting Started With TA65 Thermostat
Prerequisites. Clear Wi-Fi Configuration
Tip
如果您的 TA65 是第一次使用,或者您的 TA65 从来没有连接上任何 Wi-Fi 路由器, 可以跳过这一步。
如果您的 TA65 连接上 Wi-Fi 路由器使用过,当您需要连接新的 Wi-Fi 路由器时,需要首先清除 TA65 的 Wi-Fi 配置。
在 TA65 上同时长按 Mode、Power 两个按键 10 秒钟。

进入 Wi-Fi 参数清除模式 P19。

按 Up 或 Down, 选择 Yes。
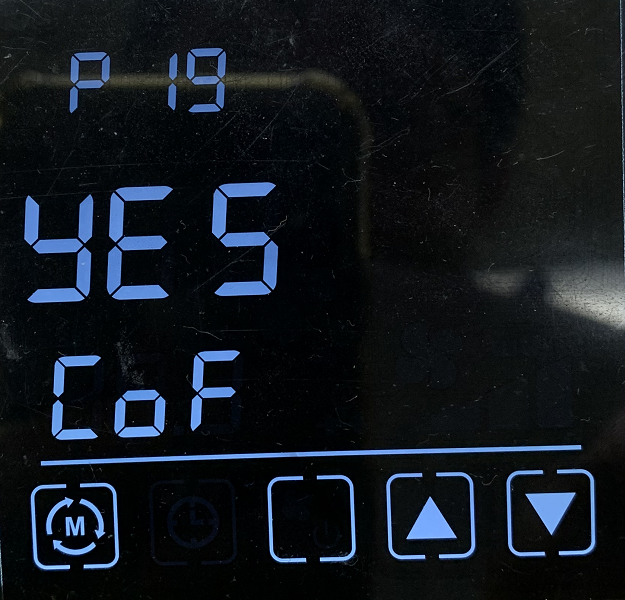
按 Mode 返回至正常界面,则 Wi-Fi 参数清除。
Step 1. Power On
When you first power up, TA65 will enter Wi-Fi AP mode without any Wi-Fi parameters. At this point, you can configure the parameters through the web page.
Tip
TA65 has a different Wi-Fi Hotspot name every time it’s powered on.
Step 2. Configure
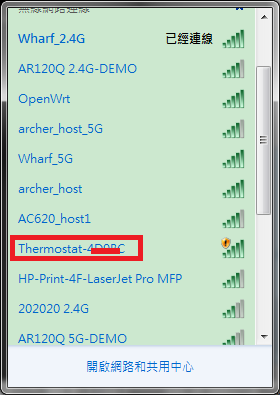
Connect to TA65’s Wi-Fi hotspot on your computer or phone.
Open your browser, type
http://192.168.4.1.Input your configuration, then Apply.
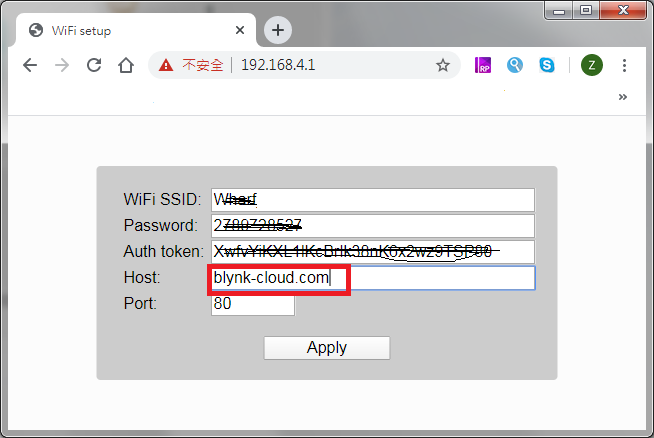
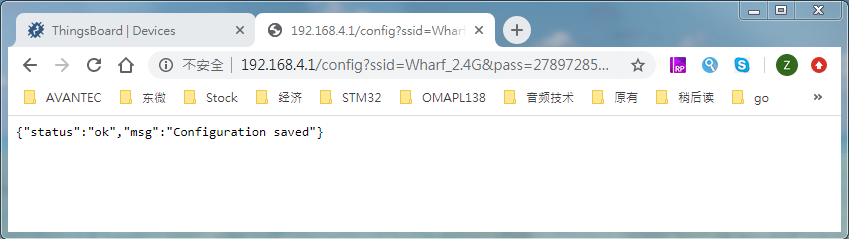
Field Description Wi-Fi SSID SSID of your Wi-Fi router Password password of your Wi-Fi router Auth Token Access Token of your TA65. See Step 4. Get Auto-Token Host This Blynk server’s IP address or domain.such as blynk-cloud.comPlease replace with your Blynk server IP AddressPort This Blynk server’s port, 80 If saved successfully, the following will be displayed.
Step 3. Check
Check that TA65 is properly connected to Blynk server. If you connect to it correctly, it will have a Wi-Fi icon in the top right corner and the time will not be 00:00. If you don’t set your time zone correctly on the Blynk app, the time displayed by TA65 may be a little offset.

Troubleshooting
Thermostat TA65 连不上 Wi-Fi:
如果 Thermostat 出厂后从来没有连上任何的 Wi-Fi 路由器,那它会进入 Soft-AP 模式。你能通过手机或电脑,搜索到类似 “Thermostat-xxxx”的Wi-Fi信号。
确认 Wi-Fi 路由器支持且开启了 2.4G 信号。目前有部分双频(2.4G&5G)Wi-Fi 路由器 可以关闭 2.4G 信号。请在路由器设置中打开它。
确认你的 Wi-Fi SSID、Password 正确,而且是 2.4G Wi-Fi 信号的相关参数。
确认 Token 正常。
- 确认 Token 与实物的型号对应正确(TA65-FH-TB 的 Token 只能连 TA65-FH-TB 的 Thermostat. TA65-FC-TB 也是如此)。
- 确认 Token 没有在复制过程出错。
- 确认 Token 没有特殊字符。Token 只能包含 A-Z、a~z、0~9。在积端情况下会出现 “-” 等非法字符。你可以在 Step 4. Get Auto-Token 编辑获取一个新的 Token。
确认 Host 与 Port 参数正确。Host 类似 blynk-cloud.com, Port 类似 80
若以上参数确认无误,你可以从 Step 1. Power On 开始,多次尝试。


